
 はじめてのFreeBSD8.0 手引き
はじめてのFreeBSD8.0 Gnomeインストール 手引き
FreeBSD8.0のシステムインストールが完了した後に、Gnomeデスクトップ環境をインストールする手順です。1..cshrc と .profile の編集
2.xorg 導入と xorg.conf の作成
3.gnome2 導入
4.scim-anthy 導入
5.日本語フォント導入
6.dbus と hald 設定
7..xinitrc と .xsession の作成
8.procfs の設定
FreeBSDシステムインストール直後の編集環境は vi のみとなります。 vi の詳しい機能の説明は、いろいろな方々が丁寧なページをたくさん書いてくださっていますので、そういうページを参考にしていただくといいかもしれません。vi - UNIX 標準エディタ - 会津大学UNIXウィキ、viを使い倒そうなど、わかりやすく vi の使い方が説明されているのではないかと思います。
とりあえずここで最低限使う機能だけを以下に書き出してみました。
| 使用するキー | 機能 | 説明 |
| yy ( y キーを2度) | yank | バッファ上に1時的にコピー |
| p | past | 貼り付け |
| x | カーソルの下のひと文字を削除 | |
| dd ( d キーを2度) | delete | 1行削除 |
| i | Insert mode (挿入モード) | 文字を挿入する時のモード |
| Esc キー | insertモード、コマンドモードなど、モードを切り替える時に使用 | |
| Esc → Shift + z を2度 | Escキーを押し、大文字 Z を2度押して上書き保存で終了 | |
.cshrc と .profile の編集
FreeBSD では root のログインシェルは csh ですが、 .xinitrc では、 sh が使われています。 このため、 .cshrc および .profile には環境変数と alias を追加します。
.cshrc
下のようになっている初期状態の .cshrc を vi でひらきます。
# $FreeBSD: src/etc/root/dot.cshrc,v 1.30.10.1.2.1 2009/10/25 01:10:29 kensmith Exp $
#
# .cshrc - csh resource script, read at beginning of execution by each shell
#
# see also csh(1), environ(7).
#
alias h history 25
alias j jobs -l
alias la ls -a
alias lf ls -FAv alias ll ls -lA
# A righteous umask
umask 22
set path = (/sbin /bin /usr/sbin /usr/bin /usr/games /usr/local/sbin /usr/local/bin $HOME/bin)
setenv EDITOR vi
setenv PAGER more
setenv BLOCKSIZE K
if ($?prompt) then
# An interactive shell -- set some stuff up
set prompt = "`/bin/hostname -s`# "
set filec
set history = 100
set savehist = 100
set mail = (/var/mail/$USER)
if ( $?tcsh ) then
bindkey "^W" backward-delete-word
bindkey -k up history-search-backward
bindkey -k down history-search-forward
endif
endif
上記のような .cshrc を以下のように赤い文字のところを追加しましたが、これはあくまでも私の環境変数ですのでみんながみんな同じ設定ではないとご承知おきください。 それぞれの環境ごとに変更されてくださいますように。
#
# .cshrc - csh resource script, read at beginning of execution by each shell
#
# see also csh(1), environ(7).
#
alias h history 30 ← 1回の h コマンドで表示させる history 件数
alias j jobs -l
alias la ls -a
alias lf ls -FAv
alias ll ls -lA
alias ls ls -G ← ls の結果をカラー化してみせるようにとの指定
# A righteous umask
umask 22
set path = (/sbin /bin /usr/sbin /usr/bin /usr/games /usr/local/sbin /usr/local/bin $HOME/bin)
setenv EDITOR vi
setenv PAGER more
setenv BLOCKSIZE K
setenv PACKAGEROOT ftp://ftp.riken.go.jp ← PACKAGEROOT の指定
setenv LANG ja_JP.EUC ← エンコーディングの指定
if ($?prompt) then
# An interactive shell -- set some stuff up
set prompt = "`/bin/hostname -s`# "
set filec
set history = 1000 ← メモリ上の history の数の指定
set savehist = 10000 ← .bash_history に書き込める数の指定
set mail = (/var/mail/$USER)
if ( $?tcsh ) then
bindkey "^W" backward-delete-word
bindkey -k up history-search-backward
bindkey -k down history-search-forward
endif
endif
.profile
.profile は bash および sh のいわゆる B-shell 系の制御ファイルです。
以下の .profile は root ユーザのものです。赤い文字列のところを一行だけ追加しました。
# $FreeBSD: src/etc/root/dot.profile,v 1.21.10.1.2.1 2009/10/25 01:10:29 kensmith Exp $
#
PATH=/sbin:/bin:/usr/sbin:/usr/bin:/usr/games:/usr/local/sbin:/usr/local/bin:~/bin
export PATH
HOME=/root
export HOME
TERM=${TERM:-cons25}
export TERM
PAGER=more
export PAGER
alias ls ls -G
なお、これが一般ユーザである hoge の .profile であるとすると、HOMEのところの PATH が変わります。
# $FreeBSD: src/etc/root/dot.profile,v 1.21.10.1.2.1 2009/10/25 01:10:29 kensmith Exp $
#
PATH=/sbin:/bin:/usr/sbin:/usr/bin:/usr/games:/usr/local/sbin:/usr/local/bin:~/bin
export PATH
HOME=/home/hoge
export HOME
TERM=${TERM:-cons25}
export TERM
PAGER=more
export PAGER
alias ls ls -G
xorg 導入と xorg.conf の作成
xorg 導入
desktop として利用する場合、X 環境が必須となりますが、X の導入を ports で行うと時間がかかるため、pkg_add コマンドで導入します。この時に接続に行く先が、先ほど .cshrc で設定した setenv PACKAGEROOT で指定した行き先になりますが、もちろん 書いてなくても大丈夫です。
この時点で基本的な X のドライバも導入されます。確認は pkg_info で行います。 pkg_info | grep xorg の | は l (エル)でも I (アイ)でもありません。 | (パイプ)です。
xorg-7.4_2 X.Org complete distribution metaport
xorg-apps-7.4_1 X.org apps meta-port
xorg-cf-files-1.0.2_3 X.org cf files for use with imake builds
xorg-docs-1.4,1 X.org documentation files
xorg-drivers-7.4_2 X.org drivers meta-port
xorg-fonts-100dpi-7.4 X.Org 100dpi bitmap fonts
xorg-fonts-7.4 X.org fonts meta-port
xorg-fonts-75dpi-7.4 X.Org 75dpi bitmap fonts
xorg-fonts-cyrillic-7.4 X.Org Cyrillic bitmap fonts
xorg-fonts-miscbitmaps-7.4 X.Org miscellaneous bitmap fonts
xorg-fonts-truetype-7.4 X.Org TrueType fonts
xorg-fonts-type1-7.4 X.Org Type1 fonts
xorg-libraries-7.4 X.org libraries meta-port
xorg-server-1.6.1,1 X.Org X server and related programs
xorg.conf の作成
FreeBSD では Xorg 導入後も xorg.conf は作成されません。 このため /usr/local/lib/X11 配下に xorg.conf を作成する必要があります。作成の手順は以下のような手順になります。
1. Xorg コマンドを実行する(xorg.conf.new という名前のファイルができる)。
2. cp コマンドで xorg.conf としてコピーする。
3. システムに合わせて編集しなおす。
# Xorg -configure
# cp -p xorg.conf.new xorg.conf
下のものは作成したばかりの初期状態の xorg.conf.new です。
Identifier "X.org Configured"
Screen 0 "Screen0" 0 0
InputDevice "Mouse0" "CorePointer"
InputDevice "Keyboard0" "CoreKeyboard"
EndSection
Section "Files"
ModulePath "/usr/local/lib/xorg/modules"
FontPath "/usr/local/lib/X11/fonts/misc/"
FontPath "/usr/local/lib/X11/fonts/TTF/"
FontPath "/usr/local/lib/X11/fonts/OTF"
FontPath "/usr/local/lib/X11/fonts/Type1/"
FontPath "/usr/local/lib/X11/fonts/100dpi/"
FontPath "/usr/local/lib/X11/fonts/75dpi/"
EndSection
Section "Module"
Load "dbe"
Load "dri"
Load "dri2"
Load "extmod"
Load "glx"
Load "record"
EndSection
Section "InputDevice"
Identifier "Keyboard0"
Driver "kbd"
EndSection
Section "InputDevice"
Identifier "Mouse0"
Driver "mouse"
Option "Protocol" "auto"
Option "Device" "/dev/sysmouse"
Option "ZAxisMapping" "4 5 6 7"
EndSection
Section "Monitor"
Identifier "Monitor0"
VendorName "Monitor Vendor"
ModelName "Monitor Model"
EndSection
Section "Device"
### Available Driver options are:-
### Values: <i>: integer, <f>: float, <bool>: "True"/"False",
### <string>: "String", <freq>: "<f> Hz/kHz/MHz"
### [arg]: arg optional
#Option "ShadowFB" # [<bool>]
#Option "DefaultRefresh" # [<bool>]
#Option "ModeSetClearScreen" # [<bool>]
Identifier "Card0"
Driver "vesa"
VendorName "VMware"
BoardName "SVGA II Adapter"
BusID "PCI:0:15:0"
EndSection
Section "Screen"
Identifier "Screen0"
Device "Card0"
Monitor "Monitor0"
SubSection "Display"
Viewport 0 0
Depth 1
EndSubSection
SubSection "Display"
Viewport 0 0
Depth 4
EndSubSection
SubSection "Display"
Viewport 0 0
Depth 8
EndSubSection
SubSection "Display"
Viewport 0 0
Depth 15
EndSubSection
SubSection "Display"
Viewport 0 0
Depth 16
EndSubSection
SubSection "Display"
Viewport 0 0
Depth 24
EndSubSection
EndSection
私の環境に合わせて編集したものが下の xorg.conf になります。解像度は 1280x1024 にしてありますので、それぞれの環境に合わせて適時変更をして下さいますように。
編集が終了した xorg.conf は /usr/local/lib/X11/ に置きます。
Identifier "X.org Configured"
Screen 0 "Screen0" 0 0
InputDevice "Mouse0" "CorePointer"
InputDevice "Keyboard0" "CoreKeyboard"
EndSection
Section "Files"
ModulePath "/usr/local/lib/xorg/modules"
FontPath "/usr/local/lib/X11/fonts/misc/"
FontPath "/usr/local/lib/X11/fonts/TTF/"
FontPath "/usr/local/lib/X11/fonts/OTF"
FontPath "/usr/local/lib/X11/fonts/Type1/"
FontPath "/usr/local/lib/X11/fonts/100dpi/"
FontPath "/usr/local/lib/X11/fonts/75dpi/"
EndSection
Section "Module"
Load "dbe"
Load "dri"
Load "dri2"
Load "extmod"
Load "glx"
Load "record"
EndSection
Section "InputDevice"
Identifier "Keyboard0"
Driver "kbd"
option "XkbRules" "xorg"
option "XkbModel" "jp106"
option "XkbLayout" "jp"
EndSection
Section "InputDevice"
Identifier "Mouse0"
Driver "mouse"
Option "Protocol" "auto"
Option "Device" "/dev/sysmouse"
Option "ZAxisMapping" "4 5 6 7"
EndSection
Section "Monitor"
Identifier "Monitor0"
VendorName "Monitor Vendor"
ModelName "Monitor Model"
### Comment all HorizSync and VertSync values to use DDC:
HorizSync 31.5 - 64.3
VertRefresh 50.0 - 70.0
EndSection
Section "Device"
### Available Driver options are:-
### Values: <i>: integer, <f>: float, <bool>: "True"/"False",
### <string>: "String", <freq>: "<f> Hz/kHz/MHz"
### [arg]: arg optional
#Option "ShadowFB" # [<bool>]
#Option "DefaultRefresh" # [<bool>]
#Option "ModeSetClearScreen" # [<bool>]
Identifier "Card0"
Driver "vesa"
VendorName "VMware"
BoardName "SVGA II Adapter"
BusID "PCI:0:15:0"
EndSection
Section "Screen"
Identifier "Screen0"
Device "Card0"
Monitor "Monitor0"
SubSection "Display"
Modes "1280x1024"
Viewport 0 0
Depth 1
EndSubSection
SubSection "Display"
Modes "1280x1024"
Viewport 0 0
Depth 4
EndSubSection
SubSection "Display"
Modes "1280x1024"
Viewport 0 0
Depth 8
EndSubSection
SubSection "Display"
Modes "1280x1024"
Viewport 0 0
Depth 15
EndSubSection
SubSection "Display"
Modes "1280x1024"
Viewport 0 0
Depth 16
EndSubSection
SubSection "Display"
Modes "1280x1024"
Viewport 0 0
Depth 24
EndSubSection
EndSection
gnome2 導入
ports で gnome2 を導入しようとすると、死ぬほど時間がかかるため pkg_add コマンドを利用します。
なお、gnome2 は共有メモリを使用するため、 /etc/sysctl.conf に以下の赤い文字で記した2行の設定を追加します。
# $FreeBSD: src/etc/sysctl.conf,v 1.8.34.1.2.1 2009/10/25 01:10:29 kensmith Exp $
#
# This file is read when going to multi-user and its contents piped thru
# ``sysctl'' to adjust kernel values. ``man 5 sysctl.conf'' for details.
#
# Uncomment this to prevent users from seeing information about processes that
# are being run under another UID.
#security.bsd.see_other_uids=0
#
#
kern.ipc.shmmax=67108864 ← 共有メモリセグメントの最大サイズ(バイト)
kern.ipc.shmall=32768 ← 使用可能な共有メモリの総量(ページ)
#
#
scim-anthy 導入
scim-anthy を /usr/ にある ports にて導入します。
# make install clean
導入した scim-anthy を をデーモンモードで使うかどうかは .xinitrc で設定します。
日本語フォント導入
初期状態の日本語フォントは "東風" などが入っていますが、余りにも貧弱だったり、パスがちゃんと通っていなかったりするため、 ipa フォントなどの3種を追加します。
# make install clean
# cd /usr/ports/japanese/font-shinonome
# make install clean
# cd /usr/ports/japanese/font-kochi
# make install clean
dbus と hald 設定
X 環境にて gnome を利用する場合は dbus および hald を有効にしなければなりません。設定は /etc/rc.conf を vi で行い、 赤い文字の2行を追加します。
# -- sysinstall generated deltas -- # Thu Mar 4 21:25:23 2010
# Created: Thu Mar 4 21:25:23 2010
# Enable network daemons for user convenience.
# Please make all changes to this file, not to /etc/defaults/rc.conf.
# This file now contains just the overrides from /etc/defaults/rc.conf.
defaultrouter="192.168.0.254"
hostname="hoge.foo.local"
ifconfig_le0="inet 192.168.0.119 netmask 255.255.255.0"
keymap="jp.106"
moused_enable="YES"
#moused_type="auto"
sshd_enable="YES"
hald_enable="YES"
dbus_enable="YES"
設定したらシステムを再起動するか、以下のコマンドで hald および dbus を稼動させます。
# /usr/local/etc/rc.d/dbus start
なお、moused が有効になっているとマウスが dbus, hald と競合して不正な動作になるような時には、以下のように /etc/rc.conf の設定をコメントアウトして無効にしてしまうような方法もあるようです。
設定したらシステムを再起動するか、以下のコマンドで moused を停止させます。
.xinitrc と .xsession の作成
X を起動するに当たっては .xinitrc および .xsession の設定が必要です。 両ファイルは同一ですから、雛形をホームディレクトリへ .xinitrc としてコピーし、システムに適合するファイルに作り変えます。
編集するためにコピーしてきたデフォルトの .xinitrc を vi で開きます。
#!/bin/sh
# $Xorg: xinitrc.cpp,v 1.3 2000/08/17 19:54:30 cpqbld Exp $
userresources=$HOME/.Xresources
usermodmap=$HOME/.Xmodmap
sysresources=/usr/local/lib/X11/xinit/.Xresources
sysmodmap=/usr/local/lib/X11/xinit/.Xmodmap
# merge in defaults and keymaps
if [ -f $sysresources ]; then
xrdb -merge $sysresources
fi
if [ -f $sysmodmap ]; then
xmodmap $sysmodmap
fi
if [ -f $userresources ]; then
xrdb -merge $userresources
fi
if [ -f $usermodmap ]; then
xmodmap $usermodmap
fi
start some nice programs
twm & ← 初期状態の起動設定
xclock -geometry 50x50-1+1 &
xterm -geometry 80x50+494+51 &
xterm -geometry 80x20+494-0 & exec xterm -geometry 80x66+0+0 -name login
kinput2 -canna &
上の雛形ファイルでは twm で起動させる設定になっていますが、これを gnome を実行し scim-anthy を稼動させる設定に変更します。
# $Xorg: xinitrc.cpp,v 1.3 2000/08/17 19:54:30 cpqbld Exp $
userresources=$HOME/.Xresources
usermodmap=$HOME/.Xmodmap
sysresources=/usr/local/lib/X11/xinit/.Xresources
sysmodmap=/usr/local/lib/X11/xinit/.Xmodmap
# merge in defaults and keymaps
if [ -f $sysresources ]; then
xrdb -merge $sysresources
fi
if [ -f $sysmodmap ]; then
xmodmap $sysmodmap
fi
if [ -f $userresources ]; then
xrdb -merge $userresources
fi
if [ -f $usermodmap ]; then
xmodmap $usermodmap
fi
# start some nice programs
#twm &
#xclock -geometry 50x50-1+1 &
#xterm -geometry 80x50+494+51 &
#xterm -geometry 80x20+494-0 & #exec xterm -geometry 80x66+0+0 -name login
#kinput2 -canna &
sleep 3
export LANG=ja_JP.eucJP ----|
export XMODIFIERS=@im=SCIM ----|
export GTK_IM_MODULE=scim ----| scim-anthy の設定
echo '*inputMethod: SCIM' | xrdb -merge ----|
scim -d & ---------------------|
exec gnome-session ← gnome で起動するように指定
編集が終った .xinitrc は、.xsession としてコピーします。2つのファイルはまったく同じものですが、パーミッションが違ってきます。 .xsession の方には実行権限を与えて 755 として .xinitrc と共にユーザのホームディレクトリに置きます。 root ならば root/ になります。
procfs 設定
FreeBSD ではファイルシステムとして procfs がサポートされていますが、初期状態では /proc がマウントされていません。 このため、/etc/fstab に以下を記述し、起動時に /proc をマウントするようにします。
# Device Mountpoint FStype Options Dump Pass#
/dev/ad0s1b none swap sw 0 0
/dev/ad0s1a / ufs rw 1 1
/dev/ad0s1e /tmp ufs rw 2 2
/dev/ad0s1f /usr ufs rw 2 2
/dev/ad0s1d /var ufs rw 2 2
proc /proc procfs rw 0 0
/dev/acd0 /cdrom cd9660 ro,noauto 0 0
gnome 起動
gnome を起動させるには以下のコマンドを使います。
入力したらEnterキーを忘れずに。
初めての起動の時には多少の時間がかかります。
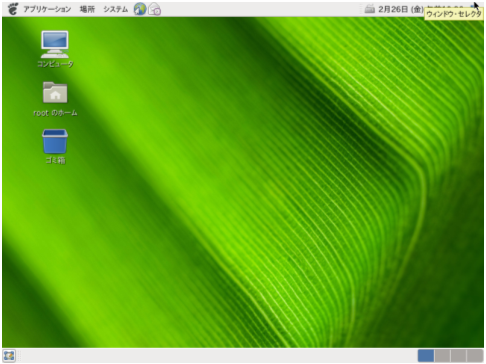
gnome の端末はアプリケーションメニューのアクセサリーの中に入っています。Linuxではないのでデスクトップ上で右クリックしても
コンテキストメニューの項目にはありません。
シャットダウンコマンドは以下のようになります。
Copyright© 2007 suzu841.com. All rights reserved.